DaDesktop for Participants - Howto
Objective
This guide is meant for participants (students) who want to attend a course on DaDesktop.
Overview of DaDesktop
DaDesktop is a cloud platform tailored for IT training. It serves IT trainers and learners, offering virtual desktops based on the revolutionary DaDesktop® technology. In a session, each participant gets a full online desktop where they can complete exercises under the trainer’s supervision.
It comprises three main components:
- Management Console -- a web UI for system administration, such as starting or stopping cloud desktops.
- Training Room -- a shared space for remote desktop sharing, audio, chat, lesson recording, etc.
-
Remote Desktop -- a virtual machine (Windows or Linux); one machine per user.
Requirements
To join from your office or home, you will need:
- A computer (PC or laptop) with a reliable internet connection (at least 10 Mbps download and 1 Mbps upload). Windows, Mac, and Linux systems are all supported.
- Chrome or Firefox web browser
- A good-quality microphone or headset (a telephone line is a last resort, but not advisable)
-
A quiet spot, free from external disturbances and noise (a coffee shop won’t do)
Recommended preparations:
- A webcam
- A second monitor; use one screen to follow the trainer and the second for your DaDesktop virtual machine during labs.
- Disable any VPN before joining the course
- If possible, turn off any security software that might interfere with the network connection.
- Use a wired Ethernet connection if available; if you’re on Wi‑Fi, run a speed test beforehand (e.g., speedtest.net) to check your connection.
You might like to try joining the course and getting familiar with the DaDesktop virtual classroom before the course begins. If you do, please note that on days before the course start, you can access the desktop for only 15 minutes.
Course Access
Kindly note that outside the course days, access is limited to a 15‑minute window.
On the course days, you can access it throughout the day. Earlier, this was allowed only about an hour before the session.
Retaining Your Desktop After the Course
A major advantage of DaDesktop is that participants can continue using their machine even after the course ends.
Refer to the link above for complete instructions.
Joining a Course
Click the link shared by the coordinator (for example, dd4t.dadesktop.com/da/join/xxxxx).

Image 01
If you are a first-time user, fill in your details under “Account” and click “Sign Up”. You can join using the form or by signing up through your Google or LinkedIn account.
If you already have an account, just log in.
This will open the Management Console for your course.

Image 02
Using the Management Console
Click on the “TRAINING ROOM” tab.
Click the “Join Training Room” button.

Image 03
The Virtual Training Room opens in a new browser window. A pop‑up will appear asking for permission to copy items to the clipboard; click “Allow”.

Image 04
Navigating the Training Room as a Participant
The Training Room displays a tab at the top of the screen with links back to the course.

Image 05
Controls available at bottom of the screen
- Here you can pop out the screen to another monitor if needed; you can also maximise the browser window to full screen.
- Similarly, at the bottom right you will see a small blue toggle for accessing the DaDesktop support chat.

Using the new Clipboard function
 To copy text—such as web links, commands, etc.—from your local machine to the virtual machine, we make use of the clipboard.
When you connect to your online course or a standalone desktop, a pop‑up like the one shown will appear. Click ‘Allow’. Please note that images cannot be copied to the clipboard at present when using DaDesktop.
Image 06
 Click the small clipboard icon in the address bar to modify the site’s clipboard settings.
Usage
- On a Windows or Linux virtual desktop, copy and paste as usual using Ctrl-C and Ctrl-V.
- On a Mac host, copy normally and then press Shift-Ctrl-V, or middle-click the mouse, to paste.
Image 07
Please reach out to us if you need further help with this feature..
Legacy Clipboard (for browsers that do not support the new clipboard, such as Internet Explorer, or as a fallback)
- To transfer text from your machine to the virtual DaDesktop machine, type or paste it into the clipboard area at the bottom left of the screen.
-
On the virtual machine, click the middle mouse button (or mouse wheel) to paste the clipboard contents onto the desktop. This works anywhere in DaDesktop that accepts text, assuming you are using the standard Linux virtual machine.
Mac users: use ⌘-C (copy) and ⌘-V (paste). Once the text is in the dd4t clipboard, inside the virtual machine you will use Control-X, Control-C, and Control-V to cut, copy, and paste. - On a Windows virtual machine, right-click to paste from the clipboard.
To resize the clipboard area, click the green-and-white arrow icon at the bottom left of the screen.
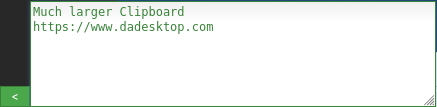

Image 08
Using the mouse in a multi-user scenario
A feature has been introduced that displays the username of the person controlling the mouse next to the cursor when multiple users are connected to the same desktop. This is especially helpful in multi‑user settings and during training exercises where different participants take control at different times.

Image 09
When more than one user is connected to the desktop, their usernames appear at the bottom centre of the screen.

Image 10
You can enable or disable this feature as needed by clicking the green ‘Info’ button at the bottom of the screen.